Transfer Exchange EDB Files Into Another File Formats
Just simply follow these steps to transfer Exchange EDB files into PST file format » See the display directions of Exchange EDB Recovery Software that move EDB file to PST file and obtain the database from corrupted .EDB files. Working steps of EDB to PST conversion allow you to observe EDB file's database in short time. Trouble-free information on an EDB conversion task & relate it more highly damaged or over sized Exchange database files to find out the results fast!
Table of Content
Some Manual Steps of Exchange Server Recovery Tool
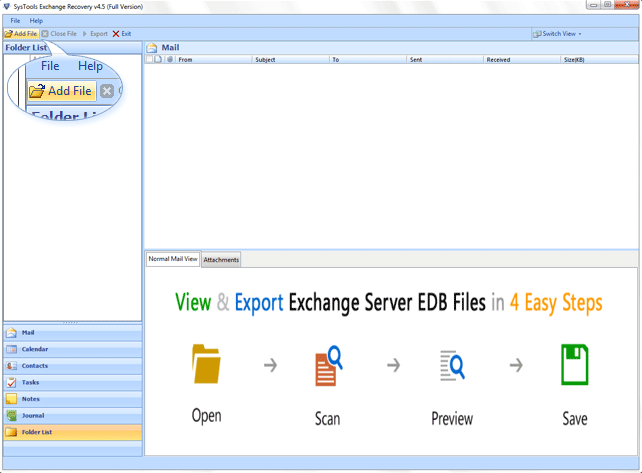
Step: 1 Hit on Start option » All Programs » Exchange Recovery. Run Exchange Recovery Software for immediate recovery. Click on Add File button.
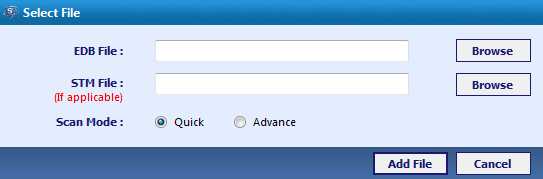
Step: 2 Then click on the Browse button to choose .EDB file from the local path.
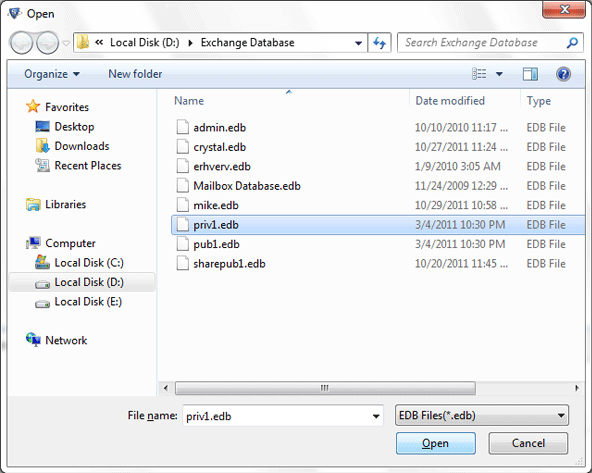
Step: 3 After that select Exchange EDB files for the EDB recovery, then click on Open button.
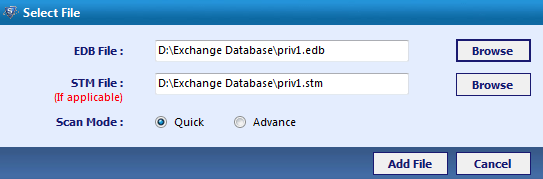
Step: 4 Next screen will be shown a open choice in which you can decide Exchange EDB and STM file path will be exposed (Software automatically attaches STM if it's accessible at the similar path). Then click on Add file button
Note: If Exchange database files are awfully corrupted in that situation try Advance Scaning choice for unlimited scanning will explain at the end point of the display.
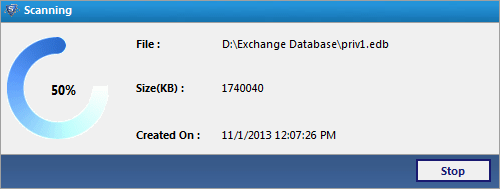
Step: 5 Now a screen will shows the Exchange database files scanning procedure.
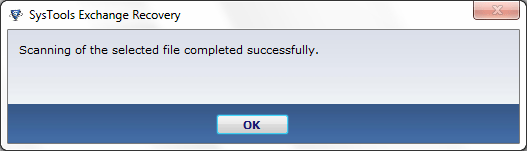
Step: 6 Then display shows a message that scanning process capably finished.
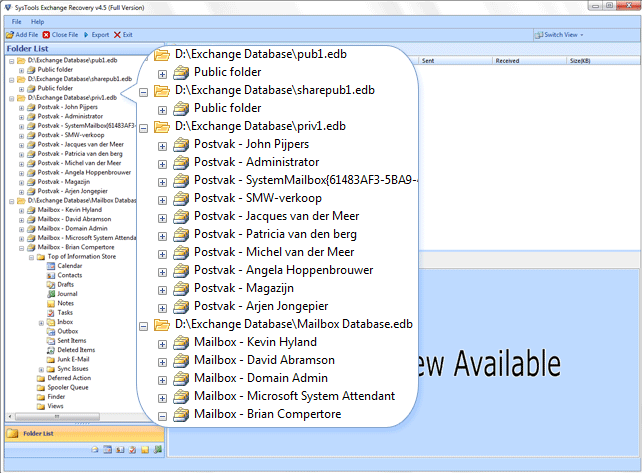
Step: 7 After this process users can watch Exchange mailboxes and hit on + to enlarge folders and files to the analysis mailbox stuff.
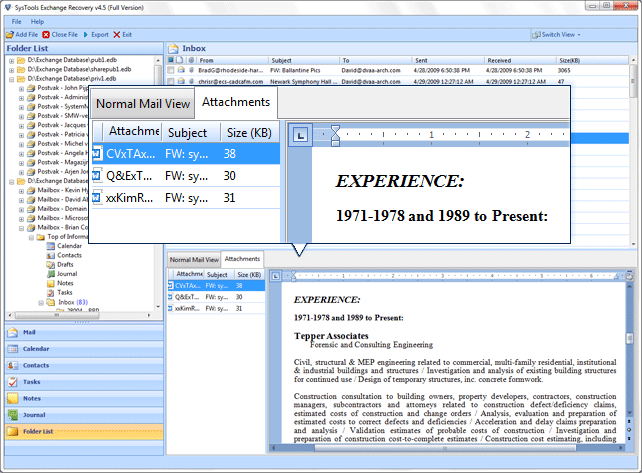
Step: 8 You can analysis Exchange mailboxes and its material detail by a Normal Mail View by clicking on a particular item such as: emails, events , attachments , tasks, journal , contact list, to do list, notes etc.
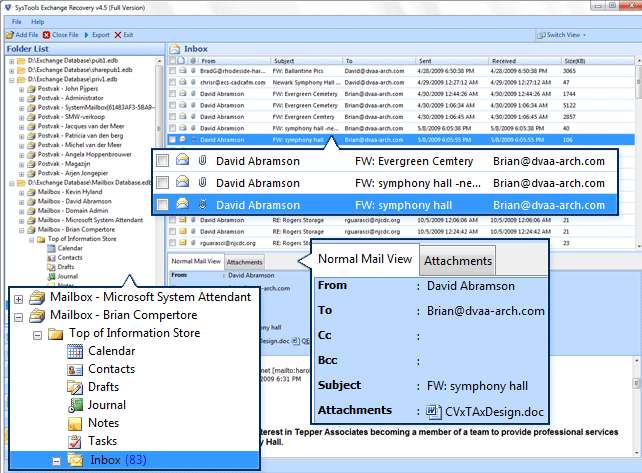
Step: 9 In next display you can watch the attachments to directly click on the Attachment choice that given below.
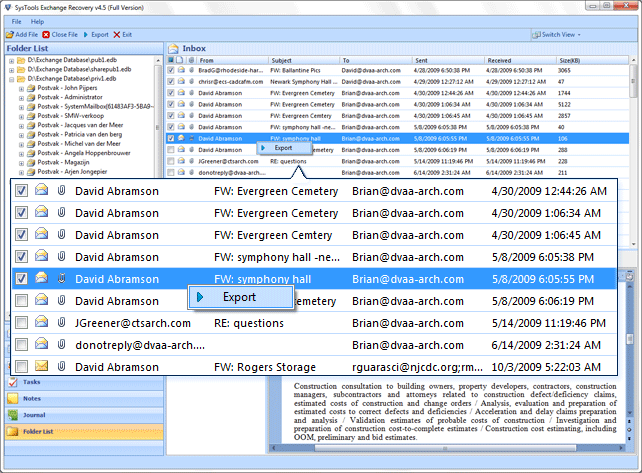
Step: 10 Select a single or several items and then click right & Export choice will be showing then hit on it to export EDB emails into the PST file format.
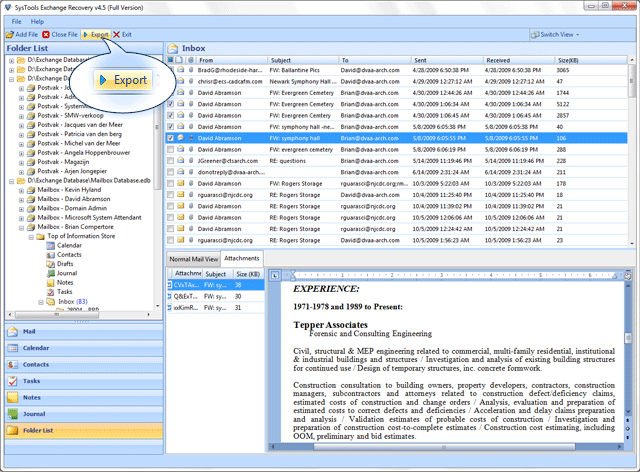
Step: 11 If not click on Export choice that showing at the top of the menu to export emails into the Outlook PST format.
Transfer Exchange Database Files Into PST Format
Step: 1 Click on the PST choice to transfer the repaired EDB files into PST format and select the desired path to restore the EDB file. On this display user can browse and select the target place to save PST file. You also check or uncheck the user mailboxes (situated in right side panel) which you desire to move.
Choice of Split PST: Obtain the size edge to a PST file among 1GB to 45 GB before saving it. Then click on the Export button.
.gif)
Step: 2 After that users can analysis the Exporting procedure will be in development.
.gif)
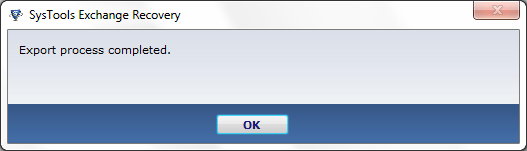
Step: 3 On next display shows a message of the fruitfully finished the whole procedure of Exchange EDB to PST Conversion.
Step: 4 Now application generates a report in CSV file format for the resulting file location.
.gif)
Step: 5 After that if you want to re-establish report click on save button otherwise click on cancel to disregard it.

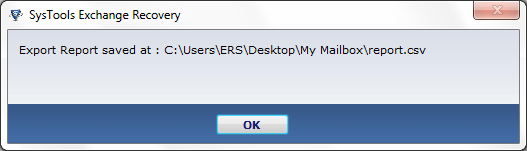
Step: 6 In last display shows CSV report that keep save in your chosen path that you wish.
Import Exchange EDB Mailboxes Into MSG Format
Step: 1 In over 11 steps provide information of the process of Exchange EDB to PST Conversion but if you want your Exchange EDB mailboxes transffered into the MSG file format just follow these steps that are given below.
Updated edition of the tool gets benefit to their users that they convert Exchange EDB files into a MSG file format. If you need to move total Exchange database into a MSG format then click on MSG option.
.gif)
Step: 2 Then click on Browse button and select a target path as well as you can check or uncheck folders and their substances which you desire to shift and then click on the Export option.
.gif)
Step: 3 The next screen shows a message of the exporting method will be in development.
.gif)
Step: 4 Now observe a message of the fruitfully accomplished the entire procedure of EDB files into a MSG file format.
Step: 5 Now software makes a report in CSV file format for the resulting file position.
.gif)
Step: 6 If you want to restore the CSV report then hit on save button or else click on cancel button to disregard it.
Step: 7 At last display shows a CSV Report restore at your preferred path in your local system.
Complete Exchange EDB Emails Into EML Format
Step: 1 Above 11 steps clarify the process of Exchange EDB files into Outlook PST file format but if you desire that your Exchange EDB emails in EML format then follow these simple working steps.
Get complete Exchange EDB emails in EML format right away then hit on the EML button to quickly export Exchange EDB emails.
.gif)
Step: 2 After that hit on Browse choice and choose a path and also you can check or uncheck files and their items which you desire to shift then click on Export key.
.gif)
Step: 3 On next display you can watch a process will appear in which user can examine.
.gif)
Step: 4 Then see a message of the successfully finished the entire process of EDB mailbox emails into a EML file format.
Step: 5 After that application generates a report in CSV file form for the resulting file location.
.gif)
Step: 6 Then if you want to re-established the CSV report so click on save key otherwise click on cancel key to ignore it.
Step: 7 On last display you can see a mesage that CSV Report saves at your desired path into your system.
Easy Exchange to Exchange Conversion Process
Step: 1 In 12 step shows an Exchange option for those users who really want their entire Exchange EDb mailbox database into another live Exchange Server.
Simply follow 11 steps correctly after that you can select the Exchange option to export inaccessible Exchange EDB database into another healthy Exchange Server.
.gif)
Step: 2 Currently you have to enter the Alias Name in which Exchange database files are imported.
.gif)
Step: 3 Exchange EDB files easily export into a new Live Exchange Server and then hit on the Export button.
.gif)
Step: 4 On the next display you can observe the Exporting process will be in development.
.gif)
Step: 5 Then Exchange to Exchange Conversion procedure successfully accomplished.
Step: 6 If you desire to obtain the entire information in CSV file then click on the Save option or else click on cancel option to disregard it.
.gif)
Step: 7 Provide the target path to re-establish the CSV report into your local system.
Step: 8 Then the display will make clear that your CSV report restore in your local path which you desire.

